Let’s start from here to make it easier for you all. Trust me, I’m an iPhone lover myself, and my first iPhone was the 5. You probably wouldn’t expect that answer; you might think I’ve been using iPhones since the very first one. But no, the 5 was my first iPhone, and since then, I haven’t looked at any other smartphone. Every feature of the iPhone is the best; there’s no competition for this phone.
But did you know that you can make your iPhone’s privacy settings even better? You can use your iPhone every day without any worry. So, the purpose of this blog is to show you how you can adjust some privacy settings to make your iPhone even safer.
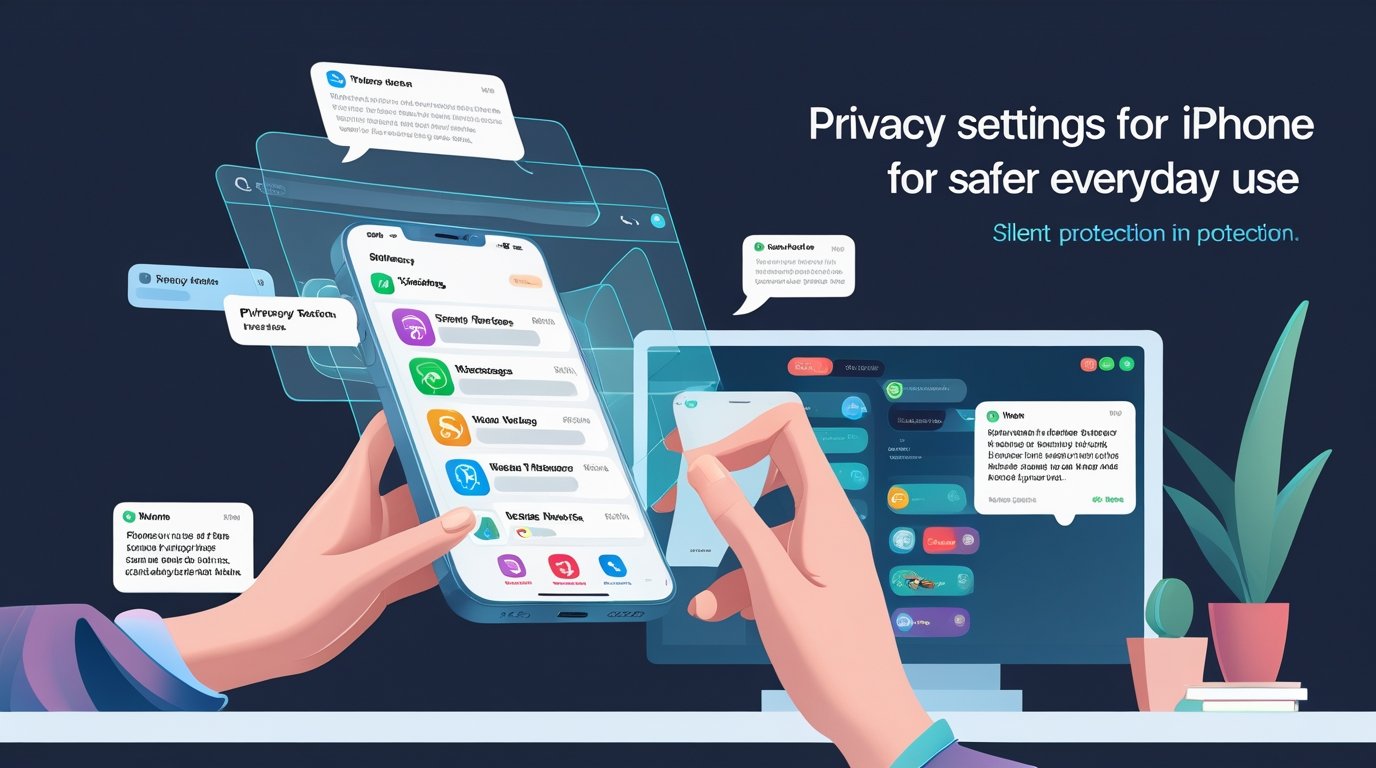
Setting Up Privacy on iPhone:
Privacy isn’t a feature you “add” later; it’s a foundation you build from the very first screen. If you skip these steps during the initial setup, you are leaving the door unlocked for anyone, from a local thief to a remote hacker, to walk right in.
A. Initial Setup Privacy Configuration:
The setup assistant is your friend, but you have to be intentional with every tap.
1. Enable Passcode/Face ID/Touch ID:
This is the single most important barrier. Without a passcode or biometric lock, your emails, banking apps, and private messages are open to anyone who picks up your phone.
- The Pro Tip: When asked for a passcode, don’t just use a simple four-digit pin. Tap “Passcode Options” and choose a 6-Digit Numeric Code or, even better, a Custom Alphanumeric Code.
- Biometrics (Face ID/Touch ID): Always enable these. They use a “Secure Enclave”, a dedicated chip in your iPhone that stores your biometric data locally. Your face or fingerprint never leaves your device and is never sent to Apple.
2. Configure iCloud Settings:
iCloud is where your digital life is stored, so it needs to be a fortress.
- Sign-In Security: Use a strong, unique password for your Apple Account (refer back to my password guide!) and immediately enable Two-Factor Authentication (2FA).
- Advanced Data Protection: This is the “hidden” gem of iPhone privacy. Go to your iCloud settings and turn this on. It provides end-to-end encryption for your most sensitive data, including Photos, Notes, and Backups. This means even if Apple itself were hacked, the thieves couldn’t read your data because only your device has the key.
B. Update to the Latest iOS Version:
I used to be the person who tapped “Remind Me Later” on every update notification. That was a massive mistake. In the world of security, an unpatched phone is a target.
1. Benefits of Updates for Security:
Software updates aren’t just about new emojis; they are about closing the “holes” that hackers use to get in.
- Zero-Day Patches: Apple regularly releases “Rapid Security Responses” to fix vulnerabilities that are being actively exploited in the wild. If you aren’t updated, you are literally walking around with a known vulnerability.
- New Privacy Tools: Every major iOS update brings new ways to protect yourself. For example, recent versions introduced “Locked and Hidden Apps” (allowing you to hide sensitive apps behind Face ID) and “Limited Contact Sharing” (so apps only see the specific contacts you choose, not your entire list).
- The Rule: Go to Settings > General > Software Update and turn on Automatic Updates. Let your phone defend itself while you sleep.
Managing Location Services:
Location services are very important in today’s world. However, managing them is even more crucial; you can’t keep your location open all the time because, in my opinion, it keeps exposing your location constantly. Obviously, there are other ways to know the location, but for my peace of mind, I prefer to keep it turned off all the time, and I only turn it on when necessary.
When your location is “Always On,” your iPhone is essentially creating a digital breadcrumb trail of your entire life. While Apple encrypts much of this, many third-party apps want this data to build a profile of your habits to sell to advertisers. To stay truly private, you need to move beyond just the “On/Off” switch and master these three layers of location defense:
1. The “While Using” Rule:
Never give an app permission to access your location “Always.” There are very few reasons a social media app or a game needs to know where you are while it’s sitting in your pocket.
- The Rule: If an app needs your location (like a weather or maps app), set it to “While Using the App.” This kills the connection the second you swipe the app away. For everything else, select “Never.”
2. Precise vs. Approximate Location:
Not every app needs to know your exact house number. A weather app only needs to know your city, not your specific street corner.
- The Feature: iOS allows you to toggle off “Precise Location” for individual apps. When turned off, the app only sees a broad circular area (about 10 square miles) rather than your exact GPS coordinates.
- Actionable Step: Go to Settings > Privacy & Security > Location Services, tap on your Weather or News app, and toggle Precise Location to OFF.
3. “Significant Locations” (The Hidden Log):
Your iPhone has a “hidden” feature that keeps track of places you visit frequently to provide “personalized services.” This is the most detailed history on your phone.
- The Privacy Risk: While this data is encrypted, many users find it uncomfortable that their phone keeps a list of their home, office, and favorite coffee shops with exact timestamps.
- Actionable Step: To clear this and stop the tracking, go to Settings > Privacy & Security > Location Services > System Services > Significant Locations. You will need Face ID to enter. From here, you can Clear History and toggle the feature OFF.
Your Actionable Defense Plan:
- Audit Your Apps: Once a month, scroll through your list in Location Services. If you see a purple or gray arrow next to an app you haven’t used lately, it’s a sign it’s tracking you. Switch it to “Never.”
- The Global Kill-Switch: If you are in a sensitive meeting or just want total “peace of mind” as you mentioned, use the main toggle at the top of the Location Services screen to shut it all down instantly.
Controlling App Permissions:
At first, I never took this thing seriously. Then, when I found out how much damage it can cause to your iPhone, I realized that I shouldn’t permit every app like this. This is because there are a lot of chances of viruses infecting your iPhone when you grant permission to any third-party app, and the consequences can be very severe.
Beyond just viruses, the real “damage” is often silent. Apps can harvest your data in the background, collecting your contact list, tracking your movements, or even listening through your microphone, to build a profile of you that is sold to the highest bidder. I’ve learned to treat every permission request as a “suspicious” one until proven otherwise.
1. The “Privacy Command Center.”
You don’t have to wait for an app to ask you for permission; you can see exactly who has access to what right now.
- Actionable Step: Go to Settings > Privacy & Security. This list is your defense line. Tap into the Microphone, Camera, and Bluetooth. If you see an app there that doesn’t need that feature to function (like a simple game asking for your Microphone), toggle it OFF immediately.
2. “Ask App Not to Track.”
Apple introduced a game-changing feature called App Tracking Transparency. This stops apps from following you across other apps and websites.
- The Rule: Every time you download a new app, you will likely see a pop-up asking if the app can track you. Always select “Ask App Not to Track.” There is zero benefit to you for allowing them to follow your digital footprints.
3. The App Privacy Report (The Detective):
If you want to see what your apps are doing behind your back, the iPhone has a built-in “detective” tool that most people ignore.
- Actionable Step: Scroll to the very bottom of the Privacy & Security menu and tap App Privacy Report. Once you turn this on, it will track which apps are accessing your data and which websites they are communicating with. If you see an app contacting 50 different tracking websites in one hour, it’s time to delete that app.
Your Actionable Defense Plan:
- Limited Photo Access: When an app asks for your photos, don’t select “Allow Access to All Photos.” Instead, choose “Select Photos…” and only give it access to the specific images it needs.
- Bluetooth Hygiene: Many apps ask for Bluetooth permission just to “sneakily” track your location via store beacons. If it’s not a music or fitness app, say “Don’t Allow.”
- The “Necessary” Test: Every time a pop-up appears, ask yourself: “Does this app need this to do its job?” If the answer is no, the permission is “No.”
Privacy Settings in iPhone:
I used to think that my iPhone was private just because it had a password on the front. I was wrong. True privacy happens in the background, where apps are constantly trying to talk to each other about you. To stop this, you need to dive into the settings and become the boss of your own data.
A. Accessing Privacy Settings:
Everything you need to protect yourself is hidden in one specific menu. Think of this as the “Privacy Hub” of your phone.
- How to get there: Open your Settings app and scroll down until you see a hand icon labeled Privacy & Security.
- What’s inside: This is where your iPhone lists every single “door” to your private life, your Camera, Microphone, Photos, and Contacts. If an app wants to use one of these doors, it has to show up on this list first. I make it a habit to check this menu once a week just to make sure no new app has sneaked in.
B. Enabling and Configuring “App Tracking Transparency”
Have you ever talked about a pair of shoes and then seen an ad for those exact shoes two minutes later? That is “Tracking.” Apps like to follow you to other websites to learn what you like so they can sell that info to advertisers.
- The “Kill Switch”: Go to Settings > Privacy & Security > Tracking.
- Actionable Step: At the top, you will see a switch that says “Allow Apps to Request to Track.” I prefer to turn this OFF completely. When you do this, your iPhone automatically tells every new app “No” before they even have a chance to ask you. It stops the digital trail in its tracks.
C. Understanding the “App Privacy Report”
If you ever wondered what your apps are doing while you aren’t looking, this is the tool for you. I call it the “Security Camera” for my data.
- What it does: It shows you exactly how many times an app has accessed your location or microphone in the last 7 days. More importantly, it shows you which web domains the app is talking to.
- Actionable Step: Scroll to the very bottom of the Privacy & Security menu and tap App Privacy Report. If you haven’t turned it on yet, do it now.
- Why it matters: If you see a simple calculator app contacting 50 different “advertising” websites, that is a huge red flag. This report gives you the evidence you need to decide which apps are safe to keep and which ones you should delete immediately.
Using Safari Privacy Features:
Everyone knows that Safari is the best, no doubt about it. And if any Android users feel bad about this, they can just go have two more eggs with their money, no worries. If some iPhone users aren’t aware, Safari also offers some privacy features that make your iPhone even more secure. These features are extremely essential for your phone.
Safari isn’t just a window to the internet; it’s a bodyguard that stands between you and the thousands of trackers trying to steal your data. If you aren’t using these specific settings, you’re leaving money on the table. Here is how to lock it down:
1. Prevent Cross-Site Tracking (Stop the Stalking):
Have you ever searched for a pair of shoes once, and then those same shoes followed you to every single website you visited for the next week? That is “Cross-Site Tracking.” Advertisers use it to build a creepy profile of your life.
- The Fix: Go to Settings > Safari and ensure “Prevent Cross-Site Tracking” is toggled ON. Safari will now block those trackers from following your digital footsteps from one site to another.
2. Hide IP Address (Hide Your Digital Home Address):
Your IP address is like your digital home address. Trackers use it to pinpoint your location and link your activity across different devices.
- The Fix: In Settings > Safari, tap “Hide IP Address” and select “From Trackers.” Now, when you visit a site, the trackers see scrambled nonsense instead of your real location. It’s peace of mind, plain and simple.
3. Fraudulent Website Warning (Your Anti-Scam Shield)
The internet is full of “phishing” sites, fake pages designed to look like your bank or Instagram login to steal your password. Safari has a massive, constantly updated database of these “bad” sites.
- The Fix: Under the Safari settings, make sure “Fraudulent Website Warning” is ON. If you accidentally click a link to a dangerous site, Safari will literally block the page with a big red warning, saving you from a massive mistake.
4. Check the “Privacy Report” (See the Proof):
Safari doesn’t just work in the dark; it shows you the receipts.
- Actionable Step: While you’re on any website in Safari, tap the “AA” icon (or the shield icon) in the URL bar and select “Privacy Report.” It will show you exactly how many trackers Safari has blocked for you on that specific page. It’s incredibly satisfying to see how many “snakes” Safari just fended off for you.
5. iCloud Private Relay (The VIP Tunnel):
If you have iCloud+, this is the ultimate flex. Private Relay encrypts your DNS records (the sites you visit) and your IP address so that no one, not even Apple or your internet provider, can see what you’re doing.
- The Fix: Go to Settings > [Your Name] > iCloud > Private Relay and turn it ON. It gives you the privacy of a VPN without the slow speeds or annoying setup.
The bottom line? If you’re on an iPhone, use Safari. If you use Safari, use these features. Don’t give the data thieves a free pass to your life.
Securing Personal Data:
Your iPhone isn’t just a phone; it’s a digital diary of your health, your friends, and your deepest secrets. You wouldn’t leave your medical records or your address book on a bus, so why let apps have a free-for-all with that data?
A. Managing Contacts and Calendars:
Contacts are gold for advertisers and data miners. When you give an app access to your contacts, you aren’t just giving away your data; you’re giving away the phone numbers and emails of everyone you know.
- The “Need to Know” Test: Ask yourself: “Does this photo editor or calculator really need to know my grandma’s phone number?” If the answer is no, the permission should be OFF.
- Actionable Step: Go to Settings > Privacy & Security > Contacts. Review every app on that list. If an app doesn’t need your contacts to function, toggle it off immediately. Do the same for your Calendars.
B. Settings for Health and Fitness Data:
Your health data, like your heart rate, sleep patterns, and cycle tracking, is the most sensitive information you own. Apple does a great job of encrypting this, but third-party fitness apps can be a weak link.
- Read vs. Write: Many apps ask to “Read” your health data (to see your steps) or “Write” to it (to log a workout). You should be very selective about who gets to “Read” your medical history.
- Actionable Step: Go to Settings > Health > Data Access & Devices. Here, you can see every app that has asked for your medical info. Cut off any app that seems unnecessary.
- The Pro Tip: Ensure Advanced Data Protection is on (in your iCloud settings) so your Health data is end-to-end encrypted in the cloud. This means even Apple can’t read your medical stats.
C. Using Encrypted Messaging Apps:
If you are sending sensitive info over regular SMS (green bubbles), you are essentially sending a postcard that anyone in the middle can read. To stay private, you need End-to-End Encryption (E2EE).
- Stick to the Blue Bubbles: iMessage is end-to-end encrypted. As long as you are talking to another iPhone user, your messages are scrambled so that only you and the recipient can read them.
- Third-Party Options: For talking to non-iPhone users, skip the regular texts. Use apps like Signal (the gold standard for privacy) or WhatsApp. These apps ensure that your “secret” conversations stay secret.
- Contact Key Verification: This is a new pro-level feature in iOS. Go to Settings > [Your Name] > Contact Key Verification and turn it on. It ensures you are actually talking to the person you think you are, preventing “Man-in-the-Middle” attacks.
By managing who gets to see your contacts and your health, you are putting a lock on your personal identity.
Additional Tips for Enhanced Privacy:
Privacy isn’t just a set of buttons you toggle; it’s a lifestyle. You have to be smarter than the people trying to track you. These final tips are the difference-makers that will keep your data safe in the “real world” where hackers and trackers are always looking for a weak spot.
A. Avoiding Public Wi-Fi for Sensitive Transactions:
Public Wi-Fi, like the ones at airports, cafes, or malls, is a playground for hackers. They can set up “fake” hotspots with names like “Free Mall Wi-Fi” just to intercept every single thing you type.
- The Rule: Never, ever log into your bank account, use your credit card, or access sensitive work emails while on public Wi-Fi. It’s like shouting your password in a crowded room.
- The Solution: If you must use the internet in public, use your Personal Hotspot from your iPhone. Your cellular data is far more secure than any “free” Wi-Fi you’ll find on the street.
B. Using VPN for Added Security:
If you absolutely have to use a public network, a VPN (Virtual Private Network) is your only savior. It creates a private, encrypted “tunnel” for your data so that even if a hacker is watching the network, all they see is scrambled, unreadable garbage.
- The Pro Choice: For iPhone users, iCloud Private Relay is a great start, but for maximum security, use a reputable third-party VPN like NordVPN or ExpressVPN.
- Actionable Step: Turn your VPN on before you connect to any network that isn’t your own home Wi-Fi. It’s an extra layer of “invisible ink” for your browsing.
C. Regularly Reviewing Privacy Settings:
Apps change their terms of service, and Apple releases new security features all the time. Privacy isn’t a “set it and forget it” thing. If you aren’t checking your settings, you’re falling behind.
- The Monthly Audit: Set a reminder on your phone to do a “Privacy Audit” on the first of every month.
- What to Check: Go back into Settings > Privacy & Security and check the Permission Manager. You’ll be surprised how many apps “accidentally” ask for more permissions after an update.
- The “App Privacy Report”: Re-read your report once a week. If an app you haven’t used in days is still pinging your location or talking to servers in other countries, delete it. No questions asked.
You Are the Ultimate Guard:
I’ve shared my journey and these specific iPhone secrets not just to give you a list of settings, but to change how you think about your phone. Whether it’s setting a strong 6-digit passcode, mastering Safari’s privacy shields, or telling a nosy app “Ask App Not to Track,” the power is 100% in your hands.
Don’t wait until your data is on the dark web or your accounts are hacked to take this seriously. My “savage” advice to the Android fans earlier was all in good fun, but the truth is, an iPhone is only as secure as the person holding it. Be proactive, be skeptical of every permission request, and treat your personal data like the gold that it is. Stay secure, stay private, and keep your business your business.
FAQs:
1. Is Face ID more secure than a simple 4-digit passcode?
Yes, Face ID is exponentially harder to bypass than a guessable 4-digit PIN.
2. What is the most important setting to turn off for location privacy?
You should disable “Significant Locations” to stop your phone from keeping a detailed log of your frequent spots.
3. Does “Ask App Not to Track” actually stop apps from spying?
It blocks the app from accessing your device’s advertising identifier, which is the main way they follow you across the web.
4. Why should I use Safari instead of other browsers on iPhone?
Safari is built specifically for iOS with deep, hardware-level privacy features like Intelligent Tracking Prevention.
5. Can an app still see my data if I delete it?
Once deleted, the app stops collecting new data, but the company may still have the data you previously gave them on their servers.
6. Is iCloud Private Relay the same thing as a VPN?
It’s similar, but it only protects your Safari browsing and unencrypted mail traffic, not your entire device’s connection.